

– It Came from Outer Space to Take Over Your Desktop –
A few years ago, I put up an Alienware Theme for Windows 7 tutorial that was massively popular. Now it’s time to build up a new desktop with Windows 10. With an amazing Alienware Visual Style for Windows 10 and a sleek Alienware Skin for Windows 10 with Rainmeter, you’ll create the best free Alienware Windows 10 Theme out there.
This theme will be split in to 3 parts: Introduction, Visual Style and Rainmeter. Each part will have step-by-step instructions to guide you along. Ready? Let’s get started!
Introduction & Preparation
The following is high-level desktop customization. You’ll be using various tools and resources to bring together a unique desktop that represents the futuristic sci-fi theme of the Alienware systems regardless of whether you actually own an Alienware PC or not.
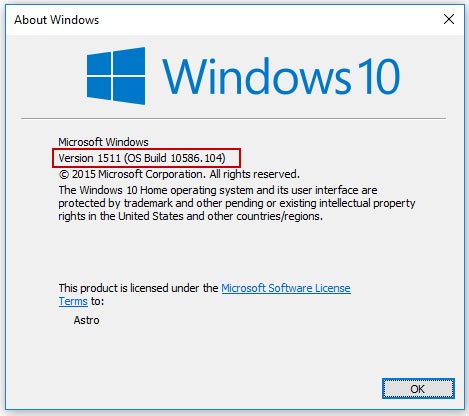
1. REQUIREMENTS: This theme requires that you have Windows 10 with the November 2015 update installed. So it must be Version 1511, Build 10586. Trying this theme on other builds is not likely to work. To find out which version of Windows you have, type winver in the start menu and hit enter.
2. CAUTION: While the process is fairly simple and should take about 15 – 30 minutes to set up, make sure you follow the instructions correctly and backup any file that you may have to modify. Just drop a comment below if you need any help. Before we begin installing the theme, make sure you create a system restore point so that we can restore our PC in case something goes wrong. It is really important you do this before going to the next step.
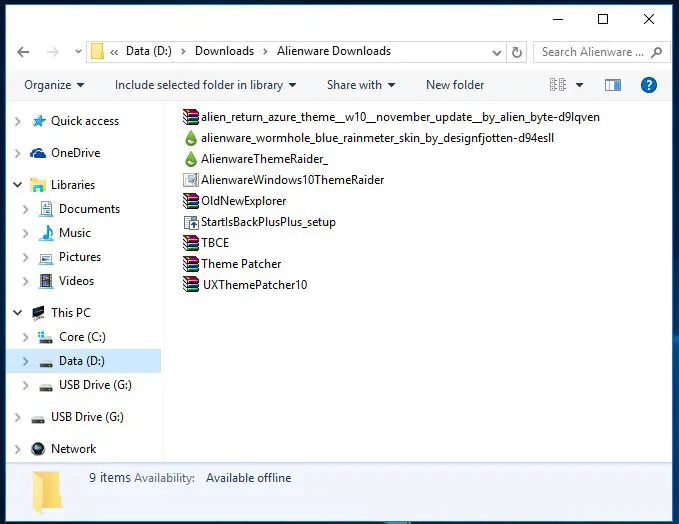
3. TO DOWNLOAD: Imagine we are going to build a spaceship and we need to assemble all the parts first. Download these 4 files that are listed below. Do NOT run any of them for now.
Extract the contents of the AlienwareThemeRaiderDownloads.rar into a new folder and put the other 3 files that you downloaded in there as well. So you end up with a similar folder like this for quick access.
Now we’ll move on to installing the visual style for our theme.
Installing Alienware Visual Style
A Visual Style is a 3rd party theme that will change several aspects of your PC. This includes changes to your explorers, task bar, start menu, cursor, sound and icons. Credits to AlienByte for creating the Alienware visual style that we’ll be using.
In order to use 3rd party themes, you need to patch your system by installing the following applications. If you’ve already used 3rd party themes before it is likely your system is already patched, in which case you may not have to install these applications again.
1. OldNewExplorer: Extract the OldNewExplorer.rar file that you downloaded to a new folder and run the OldNewExplorerCfg program. Set the settings as the same as the screenshot you see below. Hit Install and complete the installation.

2. StartIsBack: Next run the StartIsBackPlusPlus_setup.exe file that you downloaded and complete the installation. After installation, simply close the program if it runs automatically.
3. UXThemePatcher: Now extract the UXThemePatcher10.rar file that you downloaded and run the UXThemePatcher10.exe and complete the setup. After the installation is complete the system will do a quick restart.
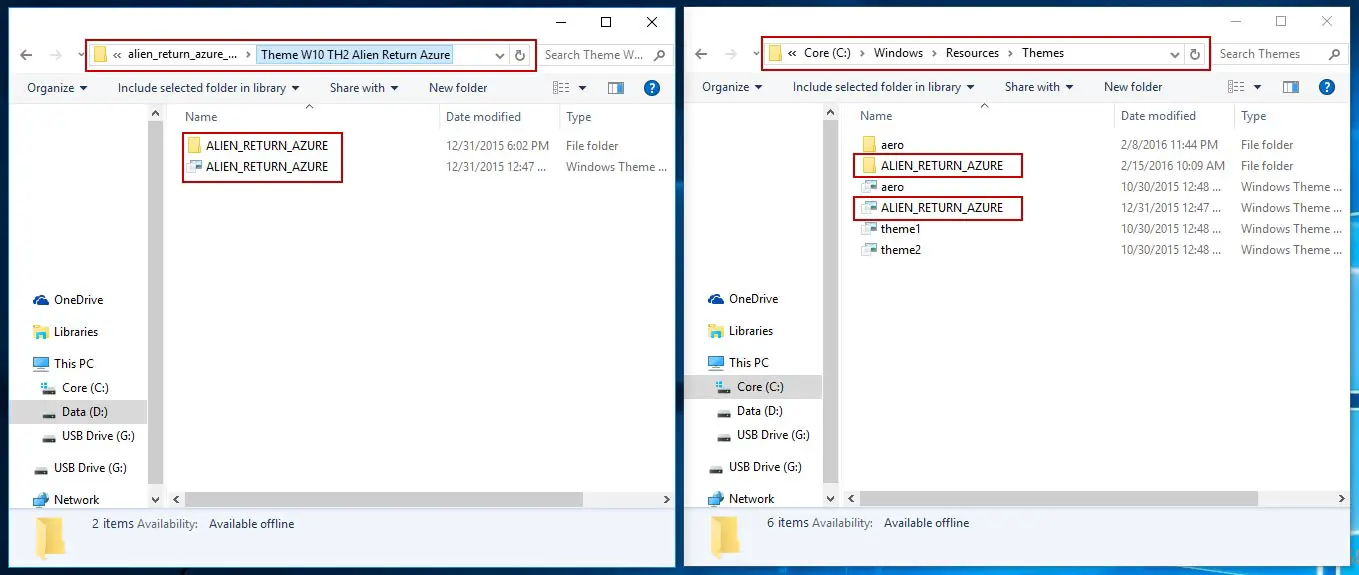
4. Copy Theme Files: The next thing we need to do is extract the contents of the alien_return_azure_theme__w10__november_update__by_alien_byte-d9lqven.zip file that you downloaded into a new folder. Navigate to the Theme W10 TH2 Alien Return Azure folder inside it.
Copy paste the two contents of that folder into the C:\Windows\Resources\Themes folder of your PC.
5. More Patching: Extract the contents of the Theme Patcher.rar that you downloaded into a new folder. You’ll find a Add_Take_Ownership_to_context_menu file inside a Take Ownership REG files folder. Run it and confirm to complete the registry change.
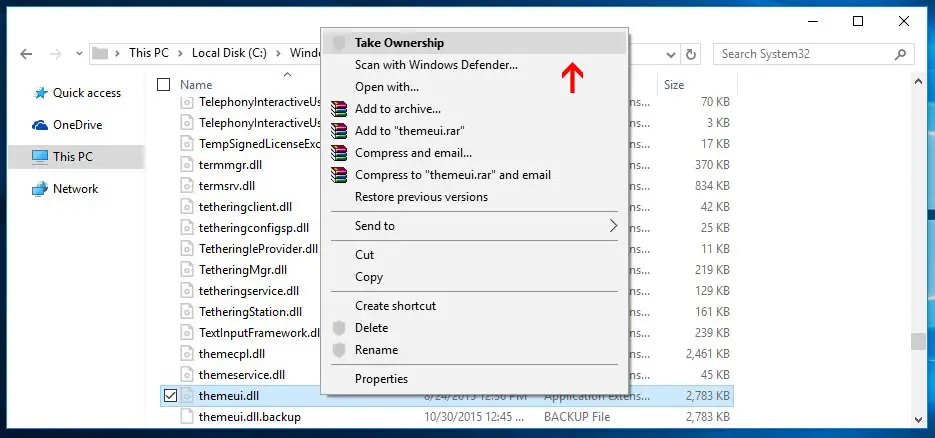
5a. Now go to your C:\Windows\System32 folder and search for themeui.dll. Right click the file and click Open File Location.

5b. Right click the file and click Take Ownership. Select Yes when prompted for confirmation.
5c. Now right click the file again and rename it to themeui.dll.del. Click Yes and then Continue when prompted.

5d. Now copy/paste the themeui.dll file that you’ll find in the File Patch x86 (if your Windows 10 is 32-bit) or File Patch x64 (if your Windows 10 is 64-bit) folders from Step 5 to the C:\Windows\System32 folder.
5e. Repeat steps 5a to 5d for two more files: uxtheme.dll and uxinit.dll.
6. RESTART: Once you’ve copy/pasted all 3 files, restart your system for patches to take effect.
7. Taskbar Color Effect: Extract the contents of the TBCE.zip file that you downloaded into a new folder. Run the Taskbar Color Effect.exe file that you extracted. You’ll find it added as a new icon in your systray. Right click the icon and go to Settings.

Once it opens, select Custom Image BG option. It’ll prompt you to select an image so browse to the Taskbar Alien Return Azure TBCE folder that you extracted in Step 4 and select that Alien Return Azure taskbar image.

Click Save for changes to take effect.
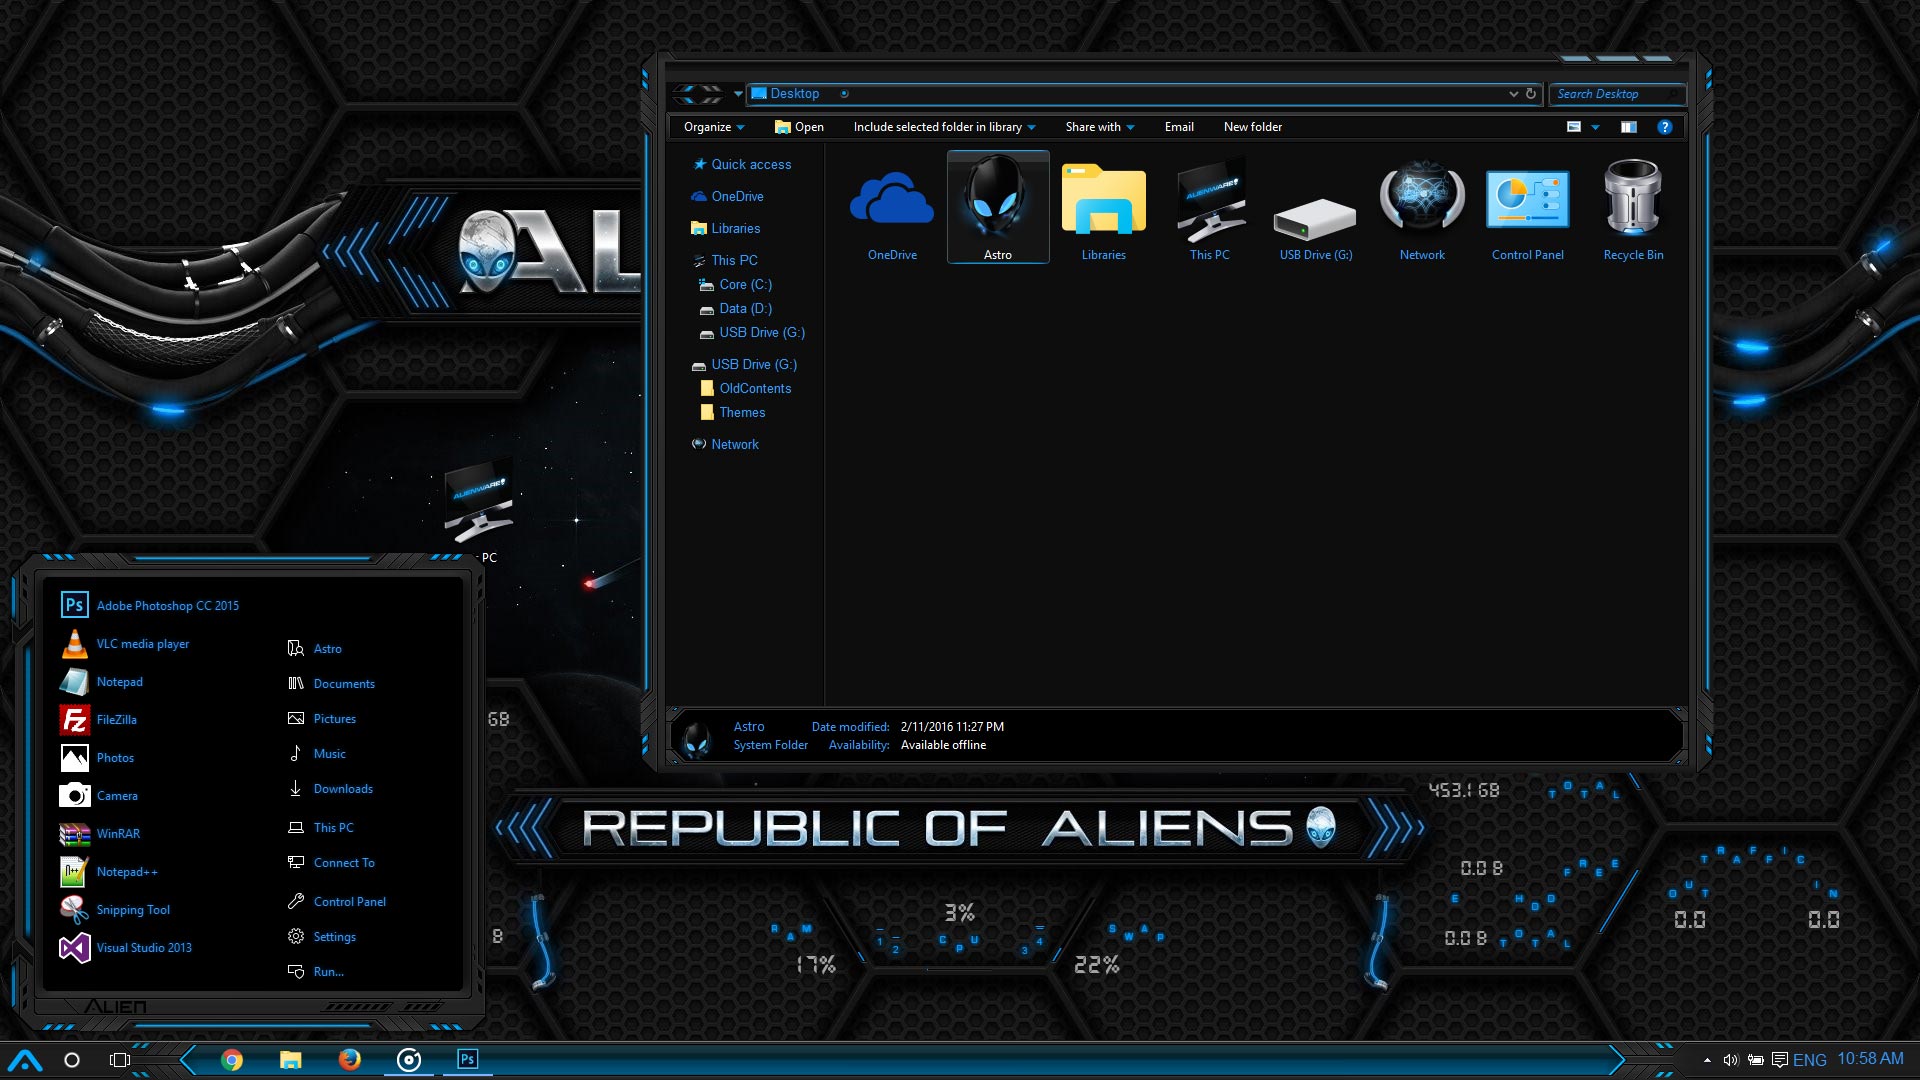
8. Alienware Theme Raider Theme Pack: For the last step, run the AlienwareWindows10ThemeRaider.deskthemepack file that you downloaded. And voila, if you did everything right, you’ll have something that looks like this with modified explorers, task bar, icons, cursors and sounds.

If your taskbar doesn’t look the same, try to run StartIsBack and set the transparency of the taskbar to 100%. Also make sure the taskbar icons are set to Large Size by right clicking the taskbar and selecting Properties.
If it still doesn’t look right, drop a comment below with a screenshot of your PC and I’ll take a look.
That’s it for the visual style. In the next part, we’ll get that cool Rainmeter skin for our desktop.
Adding Alienware Rainmeter Skin
1. Rainmeter: As you may already know, Rainmeter is a light weight productivity application that can change your desktop completely. If you don’t already have it, go right ahead and set it up.
2. Fonts: The rainmeter skin uses a font called DS-Digital so go ahead and download the DS-Digital font. Extract the fonts to a new folder and right click and select Install to install them to your PC.
3. Alienware Theme Raider Skin: Once you’ve installed Rainmeter and got the hang of things, simply run the AlienwareThemeRaider_.rmskin file that you downloaded. Credits to deviantart user designfjotten for creating the rainmeter skin and wallpaper that we use for our theme. With the settings set as below, install it.

The Alienware skin and layout should be loaded automatically. Depending on your monitor resolution the skins might not be placed exactly as you see below. You can simply click and drag as them as you like.
You’ll find several skins that show Hard Disk usage, CPU & RAM usage, Network usage and Recycle Bin status. There are 2 skins that show the Uptime of the PC as well as the current time.

And that’s it! Congrats~! You’ve successfully completed this tutorial. Kudos to you for sticking through to the end!
You can take things one step further by modifying all your icons. Here’s a cool Alienware icon pack that might be of help. You could also check out more rainmeter skins to add to your desktop.
RESET TO DEFAULT: Change the theme back to the default Windows 10 theme to switch back the Visual Style to default. Uninstall StartIsBack to switch back to the Windows 10 task bar and Start Menu.
CREDITS: As mentioned before, credits to deviantart users designfjotten and AlienByte for creating the cool rainmeter skin and visual style respectively.
Hope you liked this theme. If you have any questions, suggestions or comments, drop them below. Good luck~!

 Windows 10 Theme")


 Custom Windows Theme")


Taskbar Color Editor does not respond. What do I do?
Did you use TBCE to apply the taskbar image? If you did, open StartIsBack and go to Appearance. Then make sure the transparency is set to 100%.
If that doesn’t help, try selecting a different start menu inside the same Appearance tab in StartIsBack.
And you need to install the DS-Digital font for the rainmeter skin to look good.
Still not working.
I tried uninstalling StartIsBack and just using TBCE. No response.
StartIsBack works fine.
Screenshot attached.
Your resolution is 1366×768 right? Try using this taskbar image instead.
Hello Theme Raider,
I’m also having same issue as SJ, however, as you can see in my screenshot, I got the Windows 7 Start Menu w/o the them to it as well.
I followed instruction 3 times, w my final attempt being after fresh install of Windows 10 Home (x64) RTM V. 1511 ()S Build 10586, 104 w/o anything else install except system drivers (NO Anti-virus, Anti-Malware, Firewall, etc.). I tried image you posted for SJ, but that didn’t work (I think its wrong Res for me). My Resolution is 1920x 1080. I tried to troubleshoot as much as I can before posting, so I need ya help PLZ!!!
Thanks In Advance…
Lance
Image didn’t upload in first post!
Hi Lance
Try to choose the default aero visual style using StartIsBack. Under the Appearance tab.
Judging from your screenshot, you also need make sure the transparency is set to 100% using StartIsBack.
How it works is you would have a completely transparent taskbar even without using TBCE.
Hey Theme Raider,
Just attempted the install of this theme again, and also doing some modifications/additions from DeviantArt for Rainmeter. Startuisback had an update and was able to adjust the settings in it to include your recommedations, thus everything went well. Once I have my version of the theme completed, I’ll post a screenshot, but unfortunately, one of the authors (if I understood his request) doesn’t want mods to this theme distributed.
Thank you for your prompt reply & assistance
Lance
Hi Lance
Good to know you’ve got things going.
I don’t think I’m modding the themes. This is just a tutorial on how to use the themes as made by the original authors. ^_^ Which is why I link to their download in the first place.
No problem~ !
I was referring to my alterations of this theme for my use.
Lance
Ah I see. Looking forward to what your screenshots then.
Ah ok. Looking forward to your screenshots.
So here’s my near complete Desktop theme design. Got to tweak some font colors & styles, but this is basically my final design, using parts from several skins for Rainmeter and this theme. I thought the Start menu was to get part of this theme as well, but I’m really not stress w/ that, as long as I got the Windows 7 Start Menu that I’m accustom to.
Lance
P.S.: Check the positioning & look on my speakers, cool huh? LMAO!
Great job! Good you got the taskbar fixed too.
Hey Ya ThemeRaider,
Need ya expertise man… I have came across a theme that actually fits my style of Rainmeter skins a little better. However, the theme was originally designed for Windows 7, ported (whatever that is???) for Windows 8/8.1, but not finding a Windows 10 version. Question is: using the procedure above, can a Window 8/8.1 theme be installed on Window 10? Is there a difference between the theme itself that would make it not work? This is the theme I want to use as a base to my Rainmeter Skins…
http://www.deviantart.com/art/Jarvis-Win8-8-1-496911058
Any advise or info would be greatly appreciated, Thanks in Advance!
Lance
Hey Lance
Unfortunately, 3rd party themes for Windows 8 cannot be installed on Windows 10.
‘Ported’ is when you originally make a theme for Windows 7 but then make changes to it so it works on Windows 8 or 10. So unless someone ‘ports’ that theme to Windows 10, it can’t be installed.
You could try looking at other Windows 10 themes to see if something else fits.
http://www.deviantart.com/browse/all/customization/skins/windows/win10/
Hi, I cant seem to get the taskbar right,, can you help me?
Open StartIsBack and go to Appearance. Then make sure the transparency is set to 100%.
If that doesn’t help, try selecting a different start menu inside the same Appearance tab in StartIsBack.
Thank you I will try that. Do you have a donation link
No we don’t. Just share the site if you like it. ^_^
ThemePatcher.RAR was a crashed file when I attempted to open it.
Could be an anti-virus blocking it. The Theme Patcher is an external resource and not made by me so it might have issues.
Hi ehm well it doesn’t work for me at all somehow. 1. The Taskbar doesn’t fit, the Icons are kinda overlayed above the alienware Taskbar, and on the left and right side it doesn’t seem to fit the alienware theme. Please help : ( Also do you know whether I can use additional icon packages? Cause here are not all icons patched for example the standard folder icon or th drive icons etc.
Sorry for the bad image Quality it had 3.33MB so I had to resize it, so I can upload it here. My res is 1920×1080 46″ TV.
Thank you
1.Right click on task bar and choose Show Task View Button. That should move your icons to proper place.
2. You can use the IconPackager app to change icons.
http://www.stardock.com/products/iconpackager/
Cool thank you very much.
[…] you want an Alienware Windows 10 Theme, this is your best bet for now. I find the colors a bit too saturated for my taste though I’m […]
Hi Theme Rider
I was just follow your solving method of the taskbar on the comments but it is still not working. The resolution of my laptop is 1920×1080. BTW i cannot find the ‘”Alien Return Azure taskbar image” at step 7 when i try to redo again with TBCE. Thank you so much !!
Image didn’t upload
Hi Chris Li, when you extract the “alien_return_azure_theme__w10__november_update__by_alien_byte-d9lqven” zip file, you’ll find a “Taskbar Alien Return Azure TBCE” folder inside it.
You should find the “Alien Return Azure” taskbar image inside it.
I’ll upload the taskbar image in this comment too.
[…] while ago, I put up an Alienware Windows 10 Theme tutorial. This is the red version of the same […]
https://uploads.disquscdn.com/images/c02e68a32aa3531c82714b90389456addc0e531d94c623d92562df6b8d886996.png
it doesn’t appear like what you showed above.
Open StartIsBack and go to Appearance. Then make sure the transparency is set to 100%.
If that doesn’t help, try selecting a different start menu inside the same Appearance tab in StartIsBack.
Wheb i did 5c,d,and e i restared my laptop and it like broke it everytime it restarts it shows no display its just black screen and when i move my mouse the cursor show up but then disappears. Any possible way of fixing it. I really think i broke my laptop
Hi, did your laptop meet the requirements?
I think you should just revert your system to a previous restore point.
How do i revert the system? Remember when it boots theres no display on it i have to do something when its on the booting screen.
Boot up in safe mode first. And then system restore.
https://support.microsoft.com/en-us/help/12376/windows-10-start-your-pc-in-safe-mode
the taskbar is still the same
any suggetion?
Open StartIsBack and go to Appearance. Then make sure the transparency is set to 100%.
If that doesn’t help, try selecting a different start menu inside the same Appearance tab in StartIsBack.
Help it doesn’t seem to be right. My taskbar looks awful!!! https://uploads.disquscdn.com/images/e778b3dcc67b5006fa52b89685d81d73ec670b59fe6c03382cbf71341fc324b0.png
Open StartIsBack and go to Appearance. Then make sure the transparency is set to 100%.
If that doesn’t help, try selecting a different start menu inside the same Appearance tab in StartIsBack.
I can’t find the transparency in Appearance tab. I also chose a different start menu, but it didn’t work
Transparency is the two sliders in the Appearance tab. Make sure color is set to transparent. Also make sure transparency is set in TBCE.
TBCE only works when I open it in the folder, when i shut down the computer it resets to normal. Can i have some help?
Now it looks something like this, right? https://uploads.disquscdn.com/images/9b9f9402ffef97a067353ac298d8b9c3b2c6895dd67a477786f47991f329bb47.png
I think you need to select the correct start menu inside the Appearance tab in StartIsBack. That should remove the weird black on the left and right.
can you help me about taskbar
Open StartIsBack and go to Appearance. Then make sure the transparency is set to 100%.
If that doesn’t help, try selecting a different start menu inside the same Appearance tab in StartIsBack.
https://uploads.disquscdn.com/images/195738ea0d07ddb95c80ed4f85db2e4496da7ddeede7699a63df71ab855d2f5a.jpg
there is no download button in the link for Alien Return Azure Theme W10 (November Update) by Alien-byte. Could you provide it?
Great!! Successfully, thanks brother..